


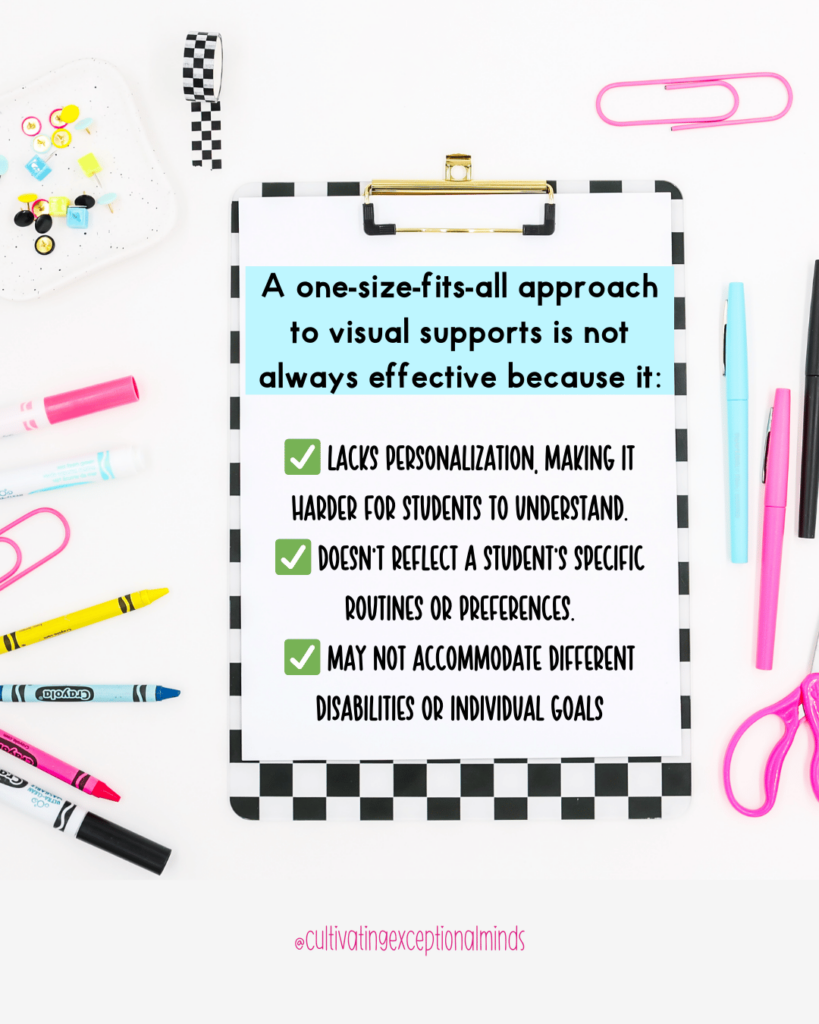
How to Create Customized Visual Supports for Special Education Classrooms: Every student in a special education classroom is unique, with different learning styles, communication needs, and sensory preferences. A one-size-fits-all approach to visual supports is not always effective because it:
Why Customized Visuals Work Better Than Generic Ones
✅ Lacks personalization, making it harder for students to understand.
✅ Doesn’t reflect a student’s specific routines or preferences.
✅ May not accommodate different disabilities or individual goals.
For example, one student may respond well to real-life photos, while another benefits more from symbol-based visuals. A child who struggles with transitions might need a first/then board, while another student might require a step-by-step visual checklist for completing independent tasks.
By customizing visual supports, you ensure that students receive information in a way that makes sense to them, increasing their independence and reducing frustration.
The Benefits of Custom Visual Supports
When you individualize visual aids, you:
✔ Increase student engagement. Students are more likely to use visuals that resonate with them and are tailored to their daily experiences.
✔ Improve comprehension. Visual supports eliminate confusion and reinforce classroom routines, behavior expectations, and communication.
✔ Support different learning styles. Whether a student learns best through pictures, words, or a combination of both, custom visuals ensure they receive information in a way they can process.
✔ Encourage independence. A well-designed visual schedule or task chart helps students complete activities on their own, reducing their reliance on verbal prompts.
Tools to Create Custom Visual Supports
To create personalized visuals, you need tools that allow flexibility and ease of use. How to Create Customized Visual Supports for Special Education Classrooms: Here are some of the best options:
📌 Canva – A free, user-friendly platform that allows teachers to create visual schedules, cue cards, and reinforcement charts with custom colors, images, and fonts.
📌 Boardmaker – A powerful tool for creating symbol-based communication supports, ideal for students who use Picture Exchange Communication Systems (PECS) or AAC devices.
📌 Editable Printable Templates – Many pre-made templates (like those found in the Custom Visuals Resource Bundle) allow for quick customization to meet students’ specific needs.
📌 Google Slides & PowerPoint – Great for making digital interactive visuals that students can access on a tablet or computer.
📌 Laminators & Velcro – Physical visuals last longer when laminated and can be easily adapted using Velcro pieces for moveable elements.
These tools allow you to create, modify, and implement visuals that truly work for your students.
Step-by-Step Guide to Creating a Visual Schedule for a Specific Student
Creating a customized visual schedule for a student may seem overwhelming at first, but breaking it down into five simple steps makes it easy to implement.
1️⃣ Assess the Student’s Needs
Before creating a schedule, ask yourself:
✔ What does this student struggle with? (Transitions? Task completion? Behavior expectations?)
✔ What level of visuals does the student understand? (Real pictures? Symbols? Text-based schedules?)
✔ What daily activities need to be included in their schedule? (Morning routine, therapy sessions, class rotations?)
2️⃣ Select the Right Format
Not all visual schedules look the same. Choose a format that matches the student’s needs and classroom environment:
✔ Printed Visual Schedules – Best for students who need a physical, hands-on reference.
✔ Digital Schedules – Ideal for students who use tablets or AAC devices for communication.
✔ First/Then Boards – Great for students who need simple, two-step guidance to stay on track.
✔ Task Strips & Checklists – Useful for independent work tasks or classroom routines.
3️⃣ Choose Visual Elements
Now, decide what kind of images and symbols will work best:
✔ Real-life photos – Best for students who relate to actual images of themselves or their environment.
✔ Icons & Symbols – Ideal for students who use AAC or PECS systems.
✔ Text-based visuals – Great for students who can read and benefit from written schedules.
Use consistent colors, fonts, and layouts to make it easy for students to recognize and understand their schedules.
4️⃣ Print, Laminate, or Use Digitally
Once the schedule is created, decide how it will be used:
✔ Laminated & Velcro-Based Schedules – Perfect for interactive schedules where students move pieces as tasks are completed.
✔ Binder-Based Visuals – Useful for keeping multiple schedules organized in one easy-to-use place.
✔ Digital Versions – Upload to tablets or classroom computers for easy accessibility.
5️⃣ Introduce the Visuals with Modeling and Repetition
The final step is teaching students how to use the visual schedule effectively. Some students may need extra time to adjust, so introduce it slowly:
✔ Model the schedule by walking through each step with the student.
✔ Provide verbal and physical cues as needed, then fade prompts over time.
✔ Make using the schedule a routine by reinforcing it daily.
📢 Want a Free Customizable Visual Schedule Template? Download it here! [Insert Link]
Additional Custom Visual Supports You Can Use
📌 Behavior Cue Cards – Help students regulate behavior with calm-down visuals, emotion charts, and positive reinforcement icons.
📌 Social Stories – Explain social situations with clear, structured visual narratives.
📌 Token Boards & Reward Systems – Encourage positive behavior with visual reinforcement charts.
📌 Environmental Labels – Label classroom areas to help students navigate the space independently.
By using a combination of these customized visual supports, you create a classroom environment that promotes independence, reduces anxiety, and supports learning for all students.
How to Get Started with Custom Visuals in Your Classroom Today
1️⃣ Download our free customizable visual schedule template! [Insert Link]
2️⃣ Choose one student who would benefit from a personalized visual system.
3️⃣ Modify an existing schedule, cue card, or reinforcement board to fit their needs.
4️⃣ Introduce it in a structured way & track student response.
✅ Check out the full Custom Visuals Resource Bundle for ready-to-use templates! [Insert Link]
📢 For more insights, listen to this week’s podcast on customizing visual supports!
Why Personalized Visuals Matter
Customizing visual supports is a small change that can make a huge impact. When students have visuals that truly reflect their needs, they:
✔ Feel more confident in their routines.
✔ Develop greater independence.
✔ Reduce frustration and challenging behaviors.
If you’re ready to create effective, personalized visuals for your students, check out our Monthly Resource Bundle with visuals to make it easier than ever!
📥 Download your free customizable visual schedule today! [Insert Link]